How to build a CMS with Directus and Next.js
A comprehensive guide on how to build a multilingual Content Management System with Directus and Next.js
A Content Management System (CMS) serves as the backbone for efficiently organizing, creating, editing, and publishing digital content, playing an indispensable role in website management. It empowers users, including content creators, editors, and administrators, by providing an intuitive interface to handle diverse content types seamlessly.
At Rezo, we use CMS everywhere, from administering website content for our clients to managing product release notes. Under the hood, we combine the power of Directus, a low-code platform, and Next.js to create an end-to-end CMS solution. This article is a complete guide that shows you how to build a CMS from the ground up, from setting up a self-hosted Directus server to developing static pages in Next.js.
Overview
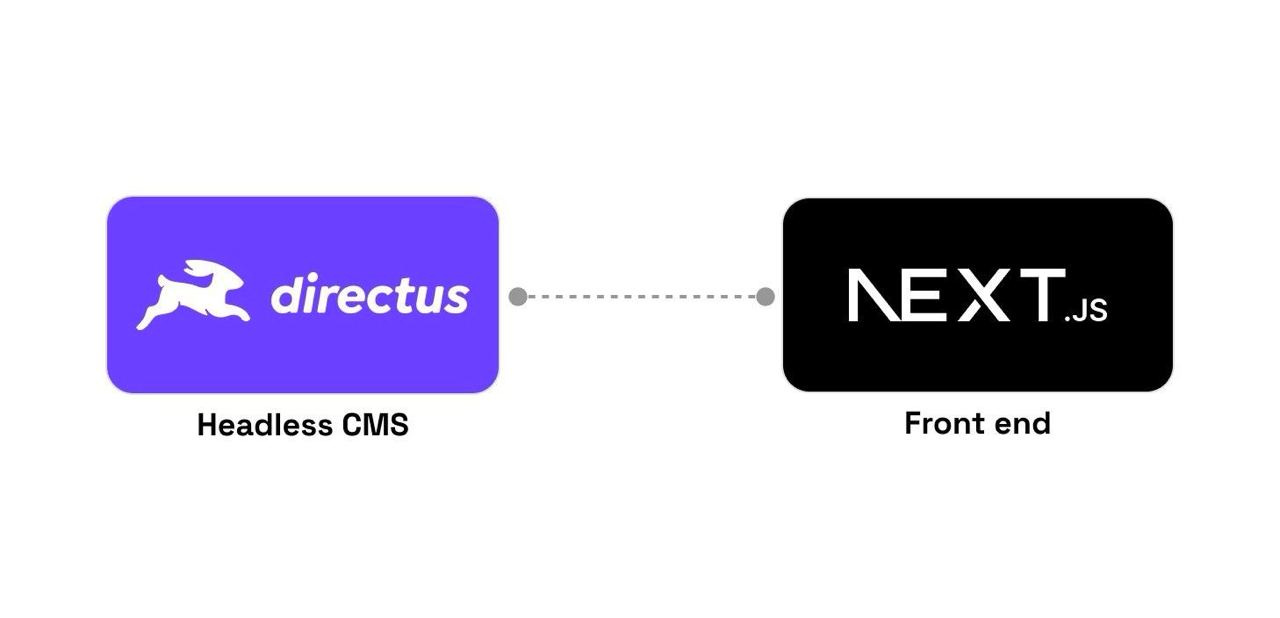
Before we dive into the tutorial, let’s take a look at the architecture of the CMS we are going to build.
The architecture consists of two main components:
Headless CMS (Directus): a headless CMS is a back-end-only CMS that makes content accessible via an API for display. While traditional CMSs like WordPress come with a built-in front end, a headless CMS does not. This allows us to build our own front end using any technology we like. There are many headless CMS solutions available, such as Strapi, but we chose Directus because it is open-source, flexible, and has a large community.
Front end (Next.js): the front end is where the content is displayed to the user. Similarly, there are many front-end frameworks to choose from, such as Nuxt.js (Vue), Create React App, and Gatsby. We chose Next.js because it is a popular React framework that comes with many features out of the box, such as server-side rendering, static site generation, and API routes. This makes it a great choice for building a CMS front end.
Here is a high-level overview of the architecture:
The workflow of the CMS is as follows:
The content creator logs into the Directus interface to create, edit, and publish content.
The Next.js application fetches the content from Directus via the RESTful API and displays it to the user.
That's all you need to know. Now let’s get started!
Prerequisites
Node >= 18. You can download it here.
Familiar with Linux/MacOS/WSL command line interface. If not, we recommend you take a look at this tutorial or try the search keyword “basic Linux commands” to learn more.
Create a self-hosted Directus server
Directus is an open-source low-code platform that allows you to create custom schemas, manage data, define roles & permissions for your organization, create workflows, analytics, etc. One of the strongest capabilities of Directus is its extensibility and flexibility, you can build whatever you want, ranging from a simple headless CMS to a complex e-commerce platform or a custom CRM.
The best part is that it can be self-hosted, meaning you have full control over your data and can deploy it on your own server. In this section, we will guide you through the process of setting up a self-hosted Directus server using Docker.
1. Install Docker
Ensure Docker is installed on your machine. You can download it from Docker's official website.
To verify that Docker is installed, run the following command in your Terminal:
docker --version2. Create Necessary Folders
Create a new folder named directus on your Desktop. Within this folder, create three empty subfolders:
databaseuploadsextensions
3. Prepare Docker Compose File
Open a text editor like Visual Studio Code, Notepad, or any code editor of your choice.
Copy the following code and save it as docker-compose.yml inside the directus folder:
version: "3"
services:
  directus:
    image: directus/directus:latest
    ports:
      - 8055:8055
    volumes:
      - ./database:/directus/database
      - ./uploads:/directus/uploads
      - ./extensions:/directus/extensions
    environment:
      KEY: "replace-with-random-value"
      SECRET: "replace-with-random-value"
      ADMIN_EMAIL: "admin@example.com"
      ADMIN_PASSWORD: "d1r3ctu5"
      DB_CLIENT: "sqlite3"
      DB_FILENAME: "/directus/database/data.db"
Replace replace-with-random-value with some random strings. If you are lazy, just run this command to generate a unique UUID:
npx uuidReplace admin@example.com and d1r3ctu5 with your preferred values.
Understand the docker-compose.yml file:
The
docker-compose.ymlfile sets up a Docker container for Directus.It exposes the Directus interface on port
8055which you can access via your web browser.The
volumessection maps thedatabase,uploads, andextensionsfolders on your local machine to the corresponding folders inside the Docker container. This is done to persist the data even if the container is removed.The
environmentsection contains configuration variables including admin credentials, database settings, and more.
4. Run Directus
Open Terminal and navigate to the directus folder and run:
docker-compose up5. Access Directus
Once running, Directus will be available at either:
If you see this screen, congratulations, you have successfully deployed a self-hosted Directus server. You can now log in using the admin email/password that you set up earlier in the docker-compose.yml file.
In this next section, you will set up all the tables necessary for your CMS.
Setup data models for CMS
One of the strongest features of Directus is that it allows non-developers to create tables in the SQL database with little knowledge of database administration. This is done through the Directus interface. You can create tables, define fields, and set up relationships between tables. This is a powerful feature that allows you to create a custom CMS tailored to your specific needs.
Directus also provides RESTful and GraphQL APIs that allow you to Create/Read/Update/Delete (CRUD) data from the database. When a new table is created, its CRUD API will be immediately available. This is great because you don’t have to build the APIs for each table manually. With this API, our Next.js front end will use it to build the static pages in the later section.
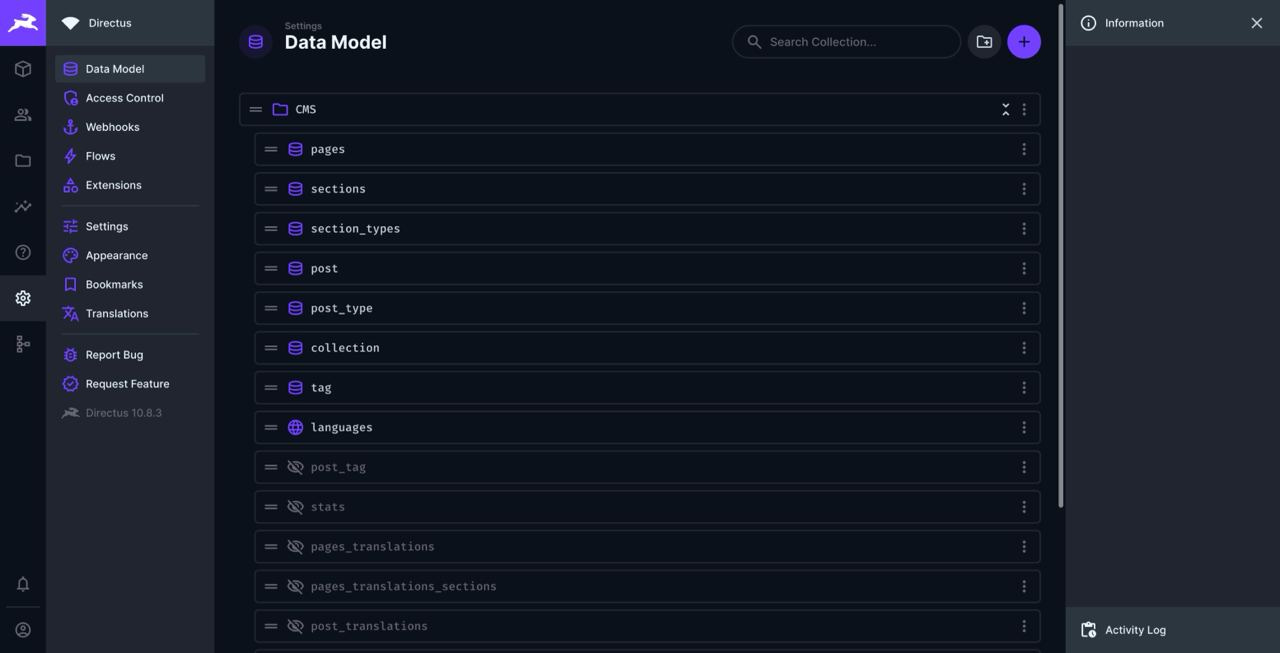
Navigate to http://localhost:8055/admin/settings/data-model, you will see this screen:
You can now start creating your own tables (Directus refers to them as Collections).
For a CMS, you would need the following main tables:
pages: stores page’s metadata such as title, description, keywords, and thumbnail.sections: the content of a page is divided into sections such as hero, post list. This table stores the type and data of a section.section_types: section type specifies how a section is rendered in the front end. For example: a hero type will display a headline and a description on the left and an image on the right.post: stores the content of our articles, blogs, products, or any type of content that can be organized in a list.post_type: used to group posts with common characteristics. Articles, products, and blogs are all post types. Each post type usually has a different schema, for example, an article has an author while a product has a price. Their layouts in the UI are also different.collection: used to group posts with related content together. A collection can also be a child or a parent of another collection, creating a tree structure similar to files & folders in our computer. Notes: don't mistake this with Directus Collections, which is a term Directus uses to refer to tables. To prevent confusion, we don’t use this term in this tutorial.tag: used to define a list of keywords related to a post.
Additionally, if you want to have multilingual support, you would have to create a languages table and a translation table for each of the above tables (i.e. pages_translations, post_translations), which will double the number of tables.
Here is the complete schema for our CMS database:
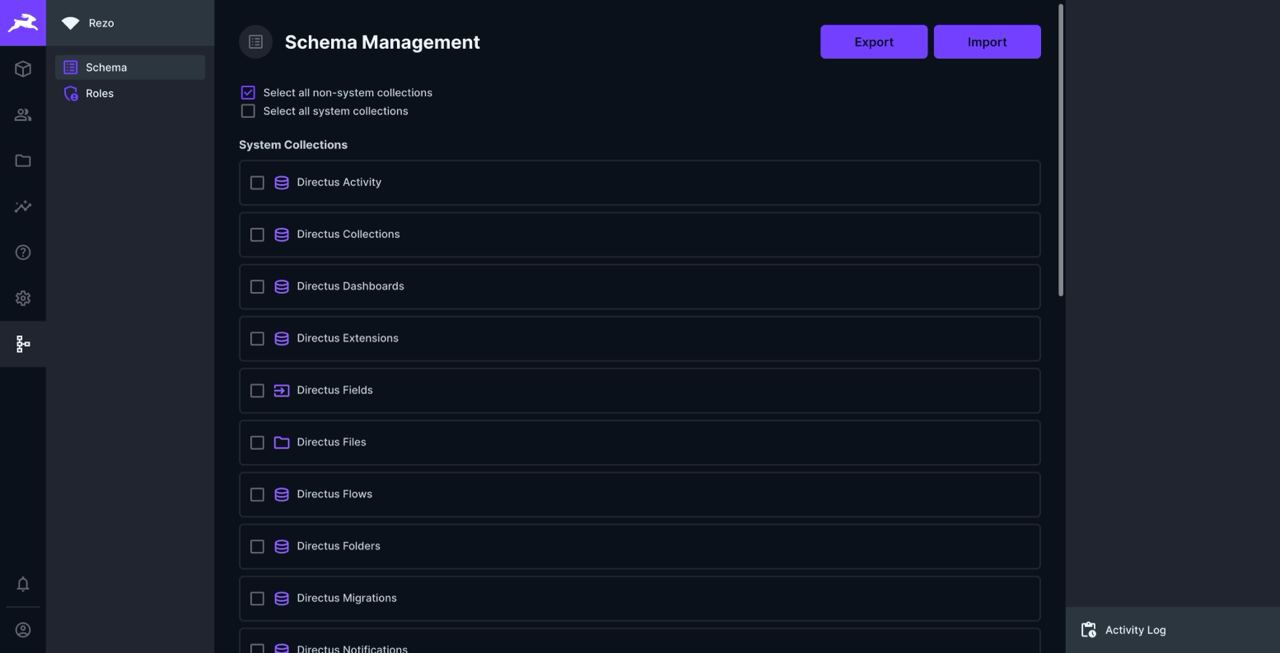
Setting up all of these tables from scratch would certainly be a headache. Fortunately, we have created an extension that can do it for you with just a few clicks. We called it “Schema Management Module”. It’s open-sourced, you can take a look: directus-extension-schema-management-module.
To use it, you will have to install it first.
Install Schema Management Module
After starting Directus in the previous section, it created multiple subfolders in the extensions folder, such as interfaces, modules, displays, hooks. They are used to contain the Directus extensions, you place the extensions to these folders based on their type.
Since our extension’s type is module, you need to install it in the extensions/modules folder.
Open another Terminal and navigate to the directus folder and run this command to download the extension:
npm view directus-extension-schema-management-module dist.tarball | xargs curl | tar -xzYou will see a new package folder appears. Now, just copy it to the extensions/modules folder:
cp -r package/dist extensions/modules/schema-management-moduleFinally, restart the server to load the extension. Return to the Terminal running docker-compose up, press Ctrl + C to stop the server, and run docker-compose up to bring it back.
Go to http://localhost:8055/admin/settings/project, in the Modules section, check the Schema Management Module, and save.
Now, you see a new icon appears on the left sidebar. This is the extension you have installed.
Import CMS schema preset
A preset is a set of tables predefined for a specific use case, beside CMS preset, we also have a preset for E-commerce. They consist of all tables necessary so you don’t have to create them manually.
Just click Import → From presets → select the Content Management System option → Import, and it will walk you through the import wizard. You can optionally choose which tables to import. But for the sake of the tutorial, we recommend you keep everything.
When it is done, you will see the tables have been created on the Data Model page:
You can click on each table to see the fields and relationships. You can also edit them to fit your needs.
Setup permissions & API token
Create an API Token
For Next.js to fetch data from Directus, you need to create an API token with appropriate permissions. This token will be used to authenticate the requests to Directus.
Directus has a very comprehensive permission system that allows you to specify which table a role can create/read/update/delete, you can even make more complex permissions such as allowing a role to read a table only if the value of a field is equal to a specific value, or allowing a role to edit a field only if the value of another field is equal to a specific value. In this tutorial, you will create a role that can only read the data.
Go to http://localhost:8055/admin/settings/roles, on this page, you will see a list of roles. Since you haven’t created any, it will only show 2 default roles: Public & Administrator.
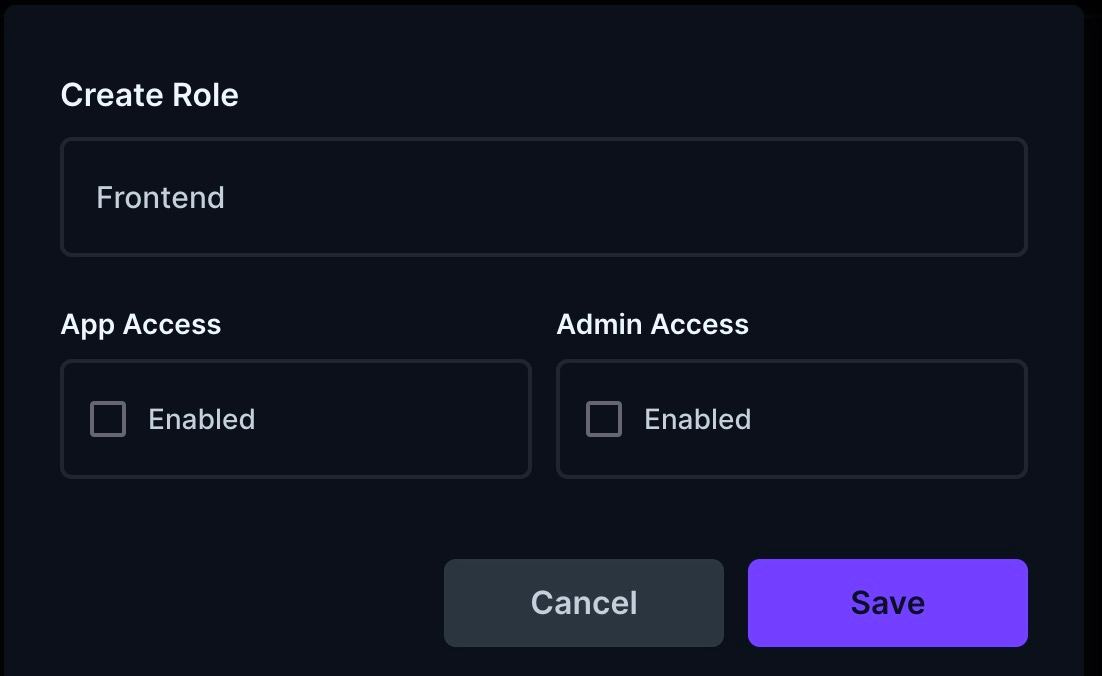
Click the Create Role ( + ) button on the top left, and a dialog will appear. Create a role named “Frontend”. This role will only have read permissions for the CMS tables and cannot log in to Directus. So you need to uncheck the App Access checkbox. Then click Save.
After creating a new role, Directus will show a permissions table where you can edit the permission of the role for each table. Simply enable read permissions for all tables, excluding the system tables, and you are done.
Next, you need to create a new user for this role to obtain the API token.
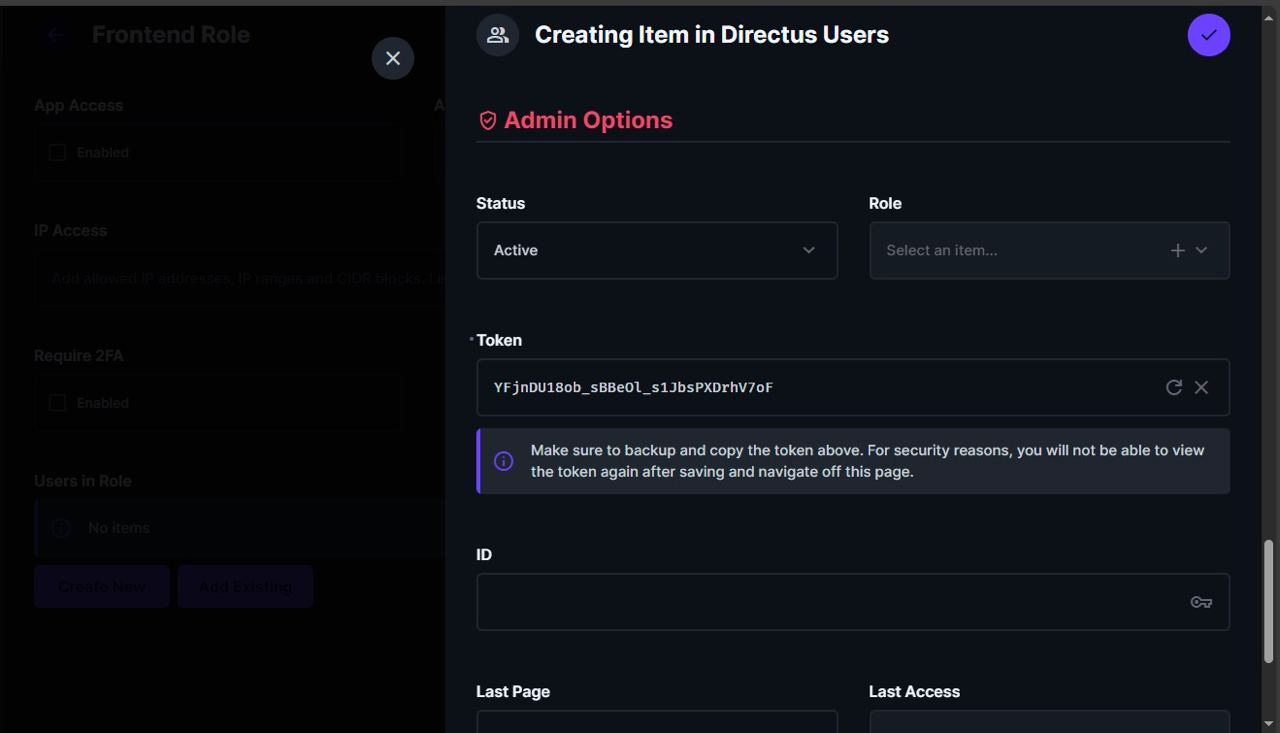
On the current page, scroll to the bottom, you will see the Users in Role section, click Create New. In the opened drawer, ignore everything, scroll to the Admin Options section, at the Token field, click the “+” button to generate a random API token. Copy the token, and save everything. This token will be used for the Next.js project.
Allow viewing media from the public
Since we are building a CMS, we will need to host media files such as images and videos and let everyone view them. By default, only authenticated users can view files hosted in Directus. However, by setting the appropriate permissions in the Public role, you can make the media files available to the public.
Important: While using the CMS, you may want to upload files for internal usage. To prevent them from being exposed to the internet, it is recommended to only allow files in a specific folder to be publicly viewable. So that you can place all media files in this folder and don’t have to worry about your private data.
In this section, we’ll create a “Public” folder and grant the read permission for the Public role to read files that are direct children of this folder.
Go to http://localhost:8055/admin/files, click the Create Folder button on the top-right, give it the “Public” name, and save.
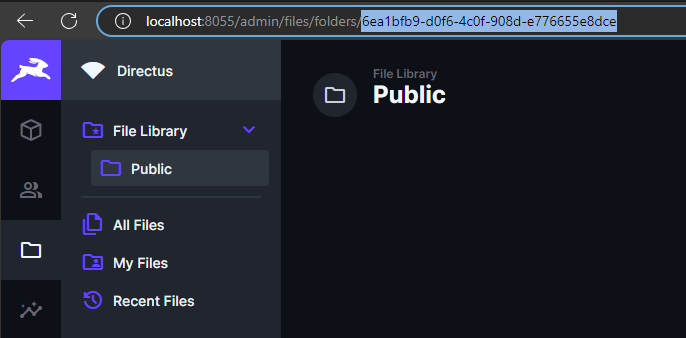
You will see the “Public” folder appear inside the File Library on the left sidebar. Click on the folder, and in the browser’s address bar, copy the long random string after localhost:8055/admin/files/folders/. Similar to the image below:
This string is the ID of the folder. It is randomly generated so it will be different in your case. We will use this to create the permission in the next step.
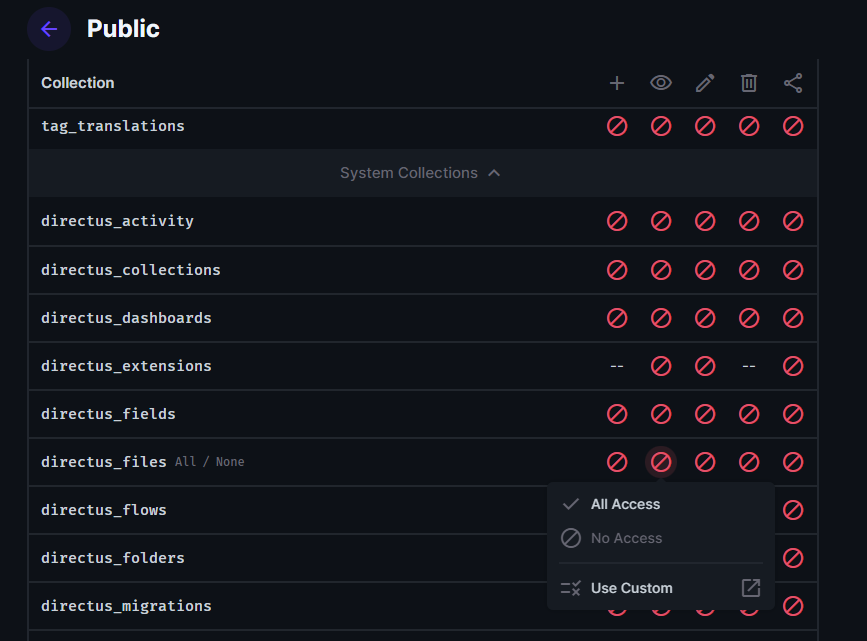
Return to the Access Control page and select the Public role. Scroll to the end of the table, expand the System Collections toggle, click the read column of the directus_files system table, and choose Use Custom.
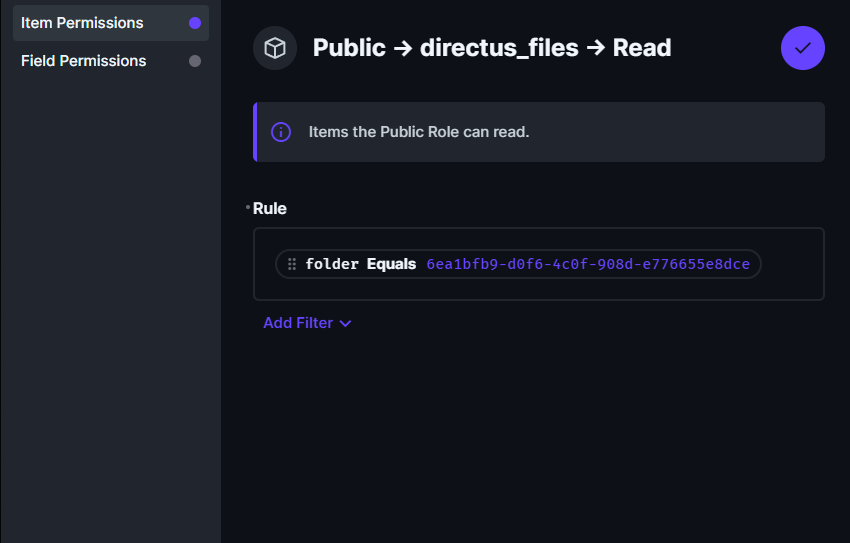
It will open a side panel where you can create custom permissions based on specific conditions, in this case, which is if the file’s folder is the “Public” folder.
In the Item Permissions panel, edit the Rule field to match the following image, remember to replace our example folder ID with the folder ID that you copied earlier.
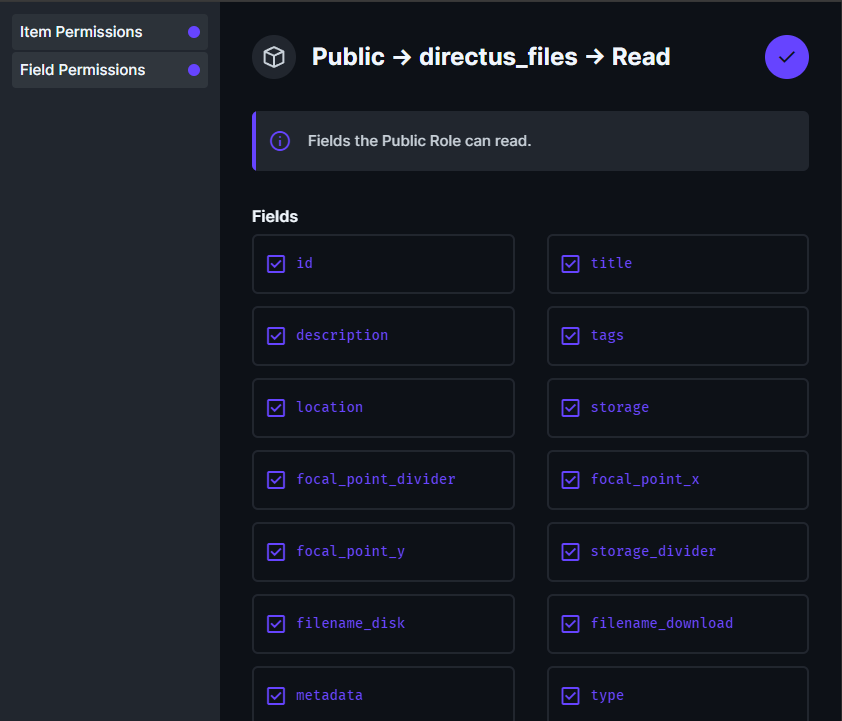
Next, in the Field Permissions panel, check all fields.
Then save.
Now, anyone can view files in the “Public” folder via the URL:
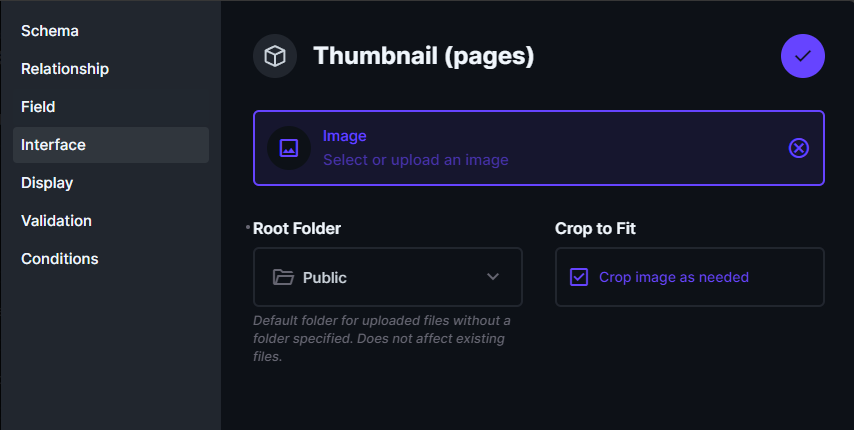
http://localhost:8055/assets/<file-id>There is one final thing to configure: update all the WYSIWYG fields and thumbnail fields to always upload to the “Public” folder. So that you don’t have to manually move the files if you want them to be publicly accessible.
This is a bit manual because we don’t know the folder ID in advance.
Just go to each field in the Setting module and select the Interface panel, select the “Public” folder in the Root Folder setting. The following image is an example of a thumbnail field:
The same goes for the WYSIWYG fields.
Here is the list of fields that you need to update for each table:
pages: thumbnail
post: thumbnail
post_type: thumbnail
collection: thumbnail
tag: thumbnail
post_translations: content
When everything is done, we will move on to the next part: create our front end.
Create a Next.js project
Setting up a Next.js project that connects to Directus API requires some configuration and boilerplate code. To speed up the process, we have created a starter project for you.
You can clone it from our GitHub repository.
git clone https://github.com/rezo-labs/cms-with-directus-nextjs.git
cd cms-with-directus-nextjs
Install the dependencies:
npm installCreate a .env.local file and add the following environment variables:
API_URL=http://localhost:8055
NEXT_PUBLIC_API_URL=http://localhost:8055
API_TOKEN=your-api-token
Replace your-api-token with the API token you created earlier.
Run the development server
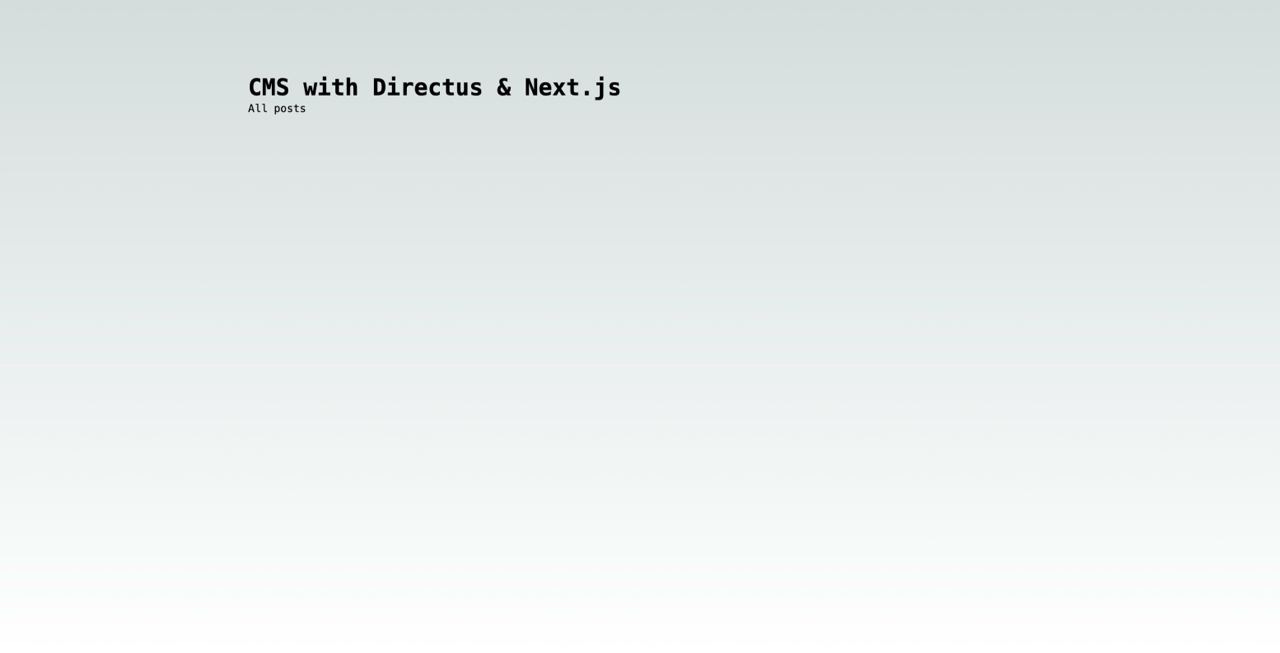
npm run devOpen http://localhost:3000/ with your browser to see the result.
Since you haven’t published anything yet, the page is empty. Let’s create a new post in Directus to see the data in action.
Publish your first post
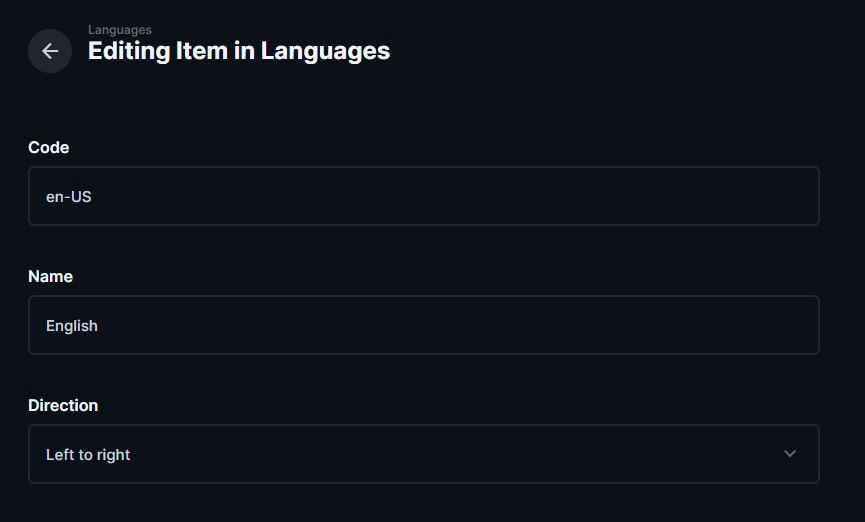
Since we designed the CMS to be multilingual, you must first define the language that you use (i.e. English) in the languages table.
Go to http://localhost:8055/admin/content/languages/+ and create a new language. There are 3 fields:
Code: the code of the language. We usually use the IETF Language Tag standard. Example: en-US, vi-VN.
Name: the name of the language. Example: English, Vietnamese.
Directus: direction of the text of the language (left to right/right to left).
After saving, you can now create your first post.
Go to http://localhost:8055/admin/content/post/+ to create a new post, remember to also create a new post type (i.e. blog) and set the status to “Published”.
Here is an example after creating a new blog post:
When you click on the post, it will redirect you to the detail page of the post:
And that’s it! You have successfully built a CMS from scratch using Directus and Next.js.
What’s next?
Now that you have a CMS up and running, you can start customizing it to fit your specific needs. Here are some ideas to get you started:
Customize the front end: the Next.js project we provided is just a starting point. You can customize it however you like. You can add new pages, components, and styles to create a unique front end for your website. You can also add features such as user authentication, search, and pagination. The possibilities are endless.
Customize the headless CMS: Directus is highly customizable. You can create new tables, fields, and relationships to fit your specific use case. For example, you can create a subscription table to manage newsletter subscriptions, or a content plan table to manage content calendars.
Deploy the CMS: the CMS we set up is running locally. If you want to make your page accessible to the public, you will need to deploy it to a server. All you need is a server with an Nginx proxy configured. You can use a cloud provider such as AWS, DigitalOcean, or Linode to host your Directus server. You can also use a platform like Vercel or Netlify to deploy the Next.js front end. Sound complicated? Don’t worry, we will cover this in a future article.
Conclusion
In this article, we have walked you through the process of building a CMS from scratch using Directus and Next.js. We have set up a self-hosted Directus server, created necessary tables for the headless CMS, set up permissions and API token, and finally created a Next.js project to consume the data from Directus.
We hope this guide has been helpful to you. If you have any questions or feedback, feel free to leave a comment below. We would love to hear from you.


